Easiest Way to Prepare Tasty Sweet and Sour Pork and cabbage
Sweet and Sour Pork and cabbage. I think the sweet and sour is a Campbell Soup Recipe, not sure.but the addition of the cabbage is her idea. It's quick and easy and very tasty and a nice change from rice or pasta.give it a try and judge This recipe was given to me by my friend in Michigan who uses her fresh cabbage from the garden. This Sweet and Sour Cabbage and Ground Pork Stir Fry is a delicious crunchy stir fry made with a sauce that is similar to the sweet and sour sauce you get from Chinese takeout places… but without the artificial color or flavors.
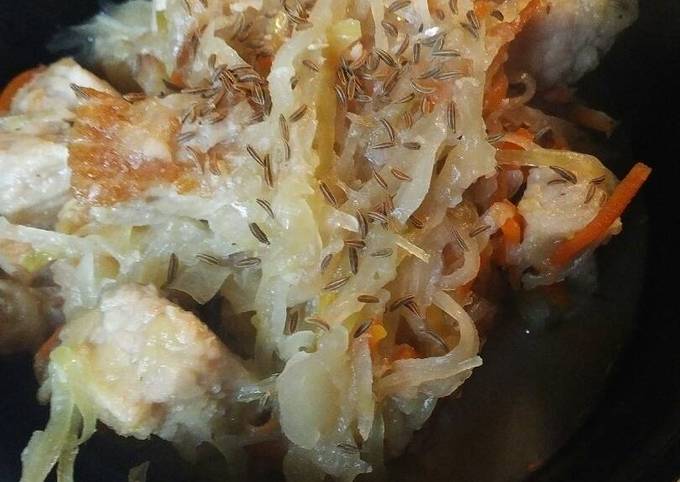 Great with sausages or pork chops. Add the cabbage and stir to combine. This Sweet and Sour Cabbage recipe with bacon is loaded with flavor and will wake up every taste bud in your mouth. Sweet and Sour Pork and cabbage very diverse and have ideal flavor that unique. Several types of Sweet and Sour Pork and cabbage recipes are also enough simple to process and do not take long. Though not everybody likes Sweet and Sour Pork and cabbage food, currently some people are get attached and like the sundry Sweet and Sour Pork and cabbage foods on hand. This could be seen from the number of restaurants that supply Sweet and Sour Pork and cabbage as one of the dishes. You can cook Sweet and Sour Pork and cabbage using 11 ingredients and 11 steps. Here is how you achieve that.
Ingredients of Sweet and Sour Pork and cabbage
- Prepare 20 ounces of marinated Cabbage see my recipe.
- You need 2 pounds of pork loin.
- Prepare 1/2 teaspoon of salt.
- It's 1/2 teaspoon of ground white pepper.
- It's 1/2 teaspoon of granulated garlic powder.
- It's 1 cup of grated carrots.
- You need 1/2 cup of chopped dates.
- You need 2/3 cup of maple syrup.
- It's 1 cup of sugar.
- You need 2 of bananas.
- You need to taste of Caraway seeds.
I love any kind of sautéed cabbage, but this Sweet and Sour Cabbage with Bacon may be my favorite. When I make it, I find myself picking the last pieces out of the pan with my fingers. This recipe for Hungarian sweet-and-sour cabbage soup - cukros ecetes kaposztaleves - tastes even better when made with the cooking water from smoked pork butt, but broth or water can be used instead. Full of old-fashioned flavor, tangy-sweet cabbage pairs well with pork roasts.
Sweet and Sour Pork and cabbage step by step
- Heat a pot and add Pork let cook till half done..
- Add carrots.
- Pour whole jar of marinated Cabbage.
- Stir well then add sugar and syrup.
- Simmer covered for 20 minutes.
- Mash bananas.
- Add to cabbage pork mixture let simmer..
- Chop the dates.
- Add to the mixture. Simmer for 20 minutes covered..
- Serve I hope you enjoy!.
- Add Caraway seeds if you like..
MORE+ LESS Meanwhile, make the sweet and sour cabbage: In a saucepan over medium-high heat, warm the olive oil. Cut the pork into slices and arrange on a warmed platter with the cabbage. All Reviews for Sweet and Sour Red Cabbage. Goes great with a roast and mashed potatoes. I used green cabbage instead of red and it was just fine.
To get ingredients for manufacture Sweet and Sour Pork and cabbage recipes is also not hard. You can easily get the main ingredients at the proximate supermarket and even on the market. There are much kinds of Sweet and Sour Pork and cabbage that are easy and quick to process into delicious dishes. You can always praxis this Sweet and Sour Pork and cabbage recipe at home, and can provide it to your children and extended family. If you wish to cook different foods on our website, we provide various types of food recipes which are of course very delicious and enjoyable to enjoy, please try they.
Recipe: Perfect Dahi (Yogurt) Naan (Flat Bread)with Paneer Curry (Indian Cottage Cheese) #mycookbook
Dahi (Yogurt) Naan (Flat Bread)with Paneer Curry (Indian Cottage Cheese) #mycookbook.
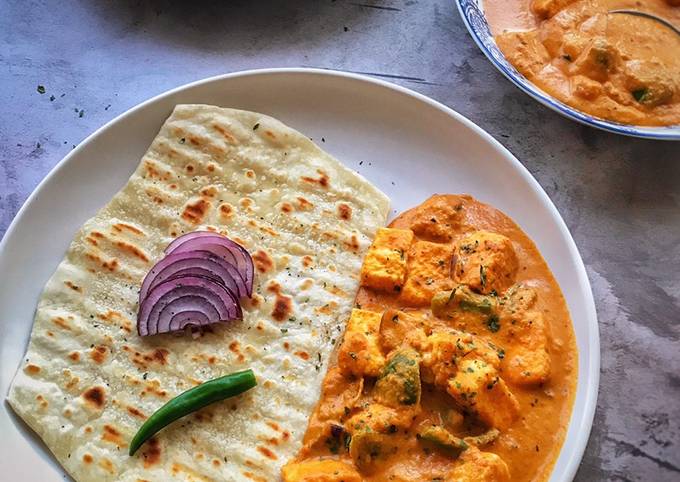 Dahi (Yogurt) Naan (Flat Bread)with Paneer Curry (Indian Cottage Cheese) #mycookbook very diverse and have mind taste that unique. Several kinds of Dahi (Yogurt) Naan (Flat Bread)with Paneer Curry (Indian Cottage Cheese) #mycookbook recipes are also enough easy to process and do not pick up lengthy. Even though not everyone likes Dahi (Yogurt) Naan (Flat Bread)with Paneer Curry (Indian Cottage Cheese) #mycookbook food, now few people are get attached and like the various Dahi (Yogurt) Naan (Flat Bread)with Paneer Curry (Indian Cottage Cheese) #mycookbook foods available. This can be visible of the number of restaurants that prepare Dahi (Yogurt) Naan (Flat Bread)with Paneer Curry (Indian Cottage Cheese) #mycookbook as one of the dishes. You can cook Dahi (Yogurt) Naan (Flat Bread)with Paneer Curry (Indian Cottage Cheese) #mycookbook using 25 ingredients and 3 steps. Here is how you achieve that.
Ingredients of Dahi (Yogurt) Naan (Flat Bread)with Paneer Curry (Indian Cottage Cheese) #mycookbook
- You need of Flour.
- You need of Whisked Yogurt.
- It's of Baking Powder.
- Prepare of Salt.
- You need of Sugar.
- Prepare of Water as required.
- Prepare of Paneer Curry.
- It's of Onion Chopped.
- You need of Paneer.
- Prepare of Tomato Chopped.
- You need of Ginger.
- You need of Ginger.
- Prepare of Cumin seed.
- You need of Butter and oil.
- Prepare of Chilli Powder.
- It's of Cashews.
- Prepare of Coriander Powder.
- You need of Turmeric powder.
- Prepare of Salt.
- It's of Garam Masala powder.
- It's of Cumin Powder.
- Prepare of Fresh Cream.
- You need of Dry Kasuri Methi.
- Prepare of Coriander.
- You need of Capsicum.
Dahi (Yogurt) Naan (Flat Bread)with Paneer Curry (Indian Cottage Cheese) #mycookbook instructions
- In a pan add some oil add one onion chopped sauté till soft add ginger garlic chopped two Tomatoes cook till soft along with some cashews. Add turmeric,chilli powder,coriander powder and sauté for while and cook them completely and grind to paste. Meanwhile sauté capsicum and keep aside and paneer..
- In a pan add butter and some oil once hot add cumin seed, add one Tsp chilli powder and sauté and add the paste quickly and cook for while add water half cup. then add garam masala and cumin powder and Dry Kasuri methi cook for while,add salt to taste..
- Once done add the capsicum and paneer and cook for while you can adjust the water but don’t make too watery. Last add some cream and cook and garnish with some coriander leaves..
Got ingredients for production Dahi (Yogurt) Naan (Flat Bread)with Paneer Curry (Indian Cottage Cheese) #mycookbook recipes is also not hard. You can easily get the main ingredients at the nearest supermarket and even on the market. There are ample kinds of Dahi (Yogurt) Naan (Flat Bread)with Paneer Curry (Indian Cottage Cheese) #mycookbook that are simple and quick to process into delicious dishes. You can constantly practice this Dahi (Yogurt) Naan (Flat Bread)with Paneer Curry (Indian Cottage Cheese) #mycookbook recipe at home, and can serve it to your children and extended family. If you want to cook another foods on our website, we prepare sundry types of food recipes which are of certainly very delicious and enjoyable to enjoy, please try them.
Recipe: Perfect Broccoli and Chana dal kababs
Broccoli and Chana dal kababs. Make a quick, simple and healthy vegan Lunch menu. Having a plant based food gives the utmost nutrients that you body require to function properly. Chana veg kabab is a vegetarian kabab delicacy with boiled and mashed chana dal.
 Chana Dal or chana dal fry recipe is a delicious recipe of spiced dal curry that I make often with chana dal (split chickpea or bengal gram). A low fat, gluten-free (don't add asafoetida) and vegan dish. Chana dal is high in fiber, a rich source of protein and also a good option for people who are on a low carb or. Broccoli and Chana dal kababs most diverse and own mind sense that unique. Few kinds of Broccoli and Chana dal kababs recipes are also sufficient simple to process and dont take lengthy. Although not everyone likes Broccoli and Chana dal kababs food, currently several people are getting attached and like the sundry Broccoli and Chana dal kababs foods available. This could be visible from the number of restaurants that prepare Broccoli and Chana dal kababs as one of the serving. You can cook Broccoli and Chana dal kababs using 15 ingredients and 11 steps. Here is how you cook it.
Ingredients of Broccoli and Chana dal kababs
- Prepare 2 cups of broccoli, coarsely grated.
- It's 1/2 cup of chana dal.
- It's 1 cup of fresh spinach, loosely packed.
- You need 1/4 cup of fresh coriander leaves.
- Prepare 1/4 cup of fresh mint, roughly chopped.
- You need 2 tbsp of rice flour.
- It's 1 of green chilli.
- It's 1 of ” piece ginger.
- You need 1/2 tsp of garam masala.
- It's 2 cloves of garlic, roughly chopped.
- You need 2 tbsp of vegetable oil.
- You need to taste of salt.
- Prepare 1 cup of bread crumbs.
- Prepare A few of skewers (soak in the cold water for an hour).
- You need of Chaat masla, sliced onions and lemon for garnish.
Home » FoodFood » Sanjeev Kapoor Kitchen » Dal Kabab. How to make Dal Kabab -. Chana dal ground, mixed with caraway seeds and other masalas and deep fried as small kababs. Cooking Recipes, Indian Recipes : Dal ke seek kabab.
Broccoli and Chana dal kababs step by step
- Rinse and soak the chana dal for about an hour in water. Boil in a pressure cooker or a pan adding salt to the water. Dal shouldn’t be mushy but should be done..
- Steam the chopped broccoli without added water in a microwave-safe bowl for 3 minutes. Keep aside..
- Take a food processor Grate broccoli in it. Add cleaned n washed spinach leaves. Give it a pulse so that it get chopped..
- Add boiled chana daal and ginger and green chili paste to it.
- Add a few chopped mint and coriander leaves too. Give a pulse again Add garam masala and salt etc to the mixture so that everything gets incorporated well.
- Transfer the mixture to a bowl and add the the flours. Mix well and add some salt if needed. The whole thing will come together like a very stiff dough..
- Lightly grease your hands and take little portion. Holding the skewer in one hand, pierce it through the cylinder. Then slowly start pressing and spreading it onto the skewer..
- Keep aside on plate and roll them in the bread crumbs. Heat up a pan, add oil. Put the kebabs and start cooking them on medium heat..
- Keep rotating them after a couple of minutes so that they are evenly brown. Sprinkle with chaat masala and sliced onions..
- Garnish with chopped Coriander leaves and squeeze some lemon Serve with any chutney of your liking.
- I served it with beet dip to bring some bright color to my platter Hope you all will like it 😀😀.
Chana dal is also commonly known as panjabi chana dal masala or chana dal fry. It's quite popular at small roadside restaurants called dhabbas. Chana Dal only needs to be cooked until it can be easily squashed between two fingers. Unlike other lentils, chana dal is cooked until its just cooked through. On a daily basis, I prepare north Indian curries with various vegetables to pair with my phulkas or bhakris.
Obtain ingredients for production Broccoli and Chana dal kababs recipes is also not hard. You can easily get the main ingredients at the closest supermarket and indeed on the market. There are many kinds of Broccoli and Chana dal kababs that are easy and quick to process into delicious serving. You can constantly practice this Broccoli and Chana dal kababs recipe at home, and can presenting it to your children and extended family. If you want to cook another foods on our website, we provide various types of food recipes which are of certainly very delicious and enjoyable to enjoy, please try they.
Easiest Way to Prepare Appetizing Authentic Indian-Style Beef Curry
Authentic Indian-Style Beef Curry. Nadan Beef Curry is one such delicacy that goes well with appam, puttu, tapioca, chappati and rice. This is a simple version of a delicious Kerala Beef Curry cooked in nadan authentic kerala style. Succulent meat and aromatic spices combine to create the ultimate curry full of flavor and deliciousness.
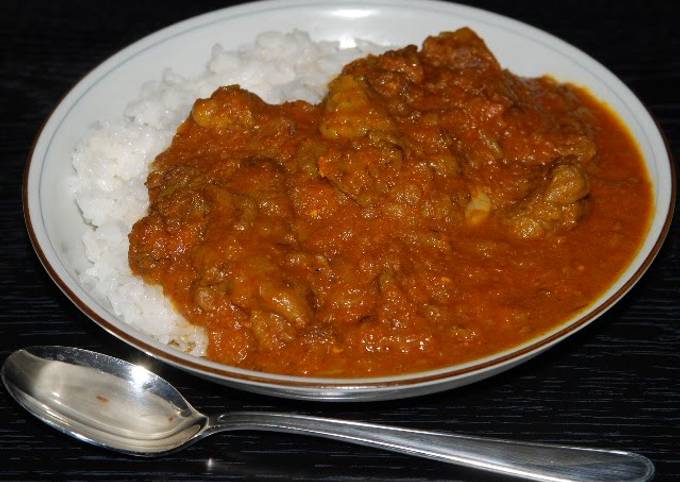 Restaurant Style Beef Curry Recipe - Bakra Eid Special Recipes by Kitchen With Amna. The gravy is made with lots of shallots, onions and spices. The onions are browned in coconut oil, which gives a deep colour and thickness to the curry. Authentic Indian-Style Beef Curry very diverse and own mind sense that unique. Few kinds of Authentic Indian-Style Beef Curry recipes are also enough convenient to process and do not take lengthy. Even though not everyone likes Authentic Indian-Style Beef Curry food, currently few people are got attached and like the sundry Authentic Indian-Style Beef Curry foods on hand. This could be seen of the number of restaurants that supply Authentic Indian-Style Beef Curry as one of the serving. You can cook Authentic Indian-Style Beef Curry using 24 ingredients and 5 steps. Here is how you cook that.
Ingredients of Authentic Indian-Style Beef Curry
- It's 600 grams of Beef (shank etc.).
- Prepare 2 tbsp of Curry powder.
- It's 1 of Vegetable oil.
- It's 1 of Salt, pepper.
- Prepare 2 of to 3 medium Onions (finely chopped).
- It's 2 tbsp of Butter.
- It's 800 ml of Water.
- You need 4 of Soup stock cubes.
- You need 4 of to 5 Bay leaves.
- Prepare 1 large of ★Carrot (grated).
- It's 2 tbsp of ★Garlic (grated).
- It's 2 tsp of ★Ginger (grated).
- You need 100 ml of ★Ketchup.
- You need 4 of to 5 tablespoons Plain yogurt.
- Prepare 2 tbsp of Chutney.
- You need 2 tbsp of ☆Turmeric.
- You need 2 tsp of ☆Garam masala.
- Prepare 2 tsp of ☆Paprika powder.
- Prepare 1 tsp of ☆Cayenne pepper.
- You need 1 tsp of ☆Allspice.
- Prepare 1 tsp of ☆Cinnamon.
- It's 1/2 tsp of ☆Cumin seeds.
- You need 1/2 tsp of ☆Coriander powder.
- Prepare 1/2 tsp of ☆Black pepper.
It tastes great with some soft parotta, aapam or idiyappam. Sear the beef in a hot pan and add to the onions along with the chopped tomatoes and tomato puree, stir over a medium-high heat for a few minutes and then add the beef stock and curry leaves. This authentic Indian ground beef recipe is called "Qeema" and is an amazingly simple yet complex tasting curried Indian dish. It's also known as Keema or Kheema, and the beauty of this Indian ground beef recipe is that it is so very authentic and yet, you will recognise every spice in the recipe.
Authentic Indian-Style Beef Curry instructions
- Rub curry powder, salt and pepper into the beef cubes evenly. Brown in oil in a frying pan..
- Transfer the meat to a pot, add water and bay leaves, and simmer while skimming off the scum. When no more scum is rising to the surface, add soup stock cubes and simmer until the meat is tender..
- While the meat is cooking, sauté the finely chopped onion in butter patiently, until it has caramelized..
- When the onions have caramelized, add all the ☆ ingredients and mix well to form a paste..
- When the meat is tender, add the spice paste from Step 4, and simmer briefly while removing any scum. Add the ☆ spices and mix well. Mix in the plain yogurt and chutney then simmer over low heat for about 30 minutes. Done!.
This warming curry has a good bit of heat to it; serve with lots of rice to round out the meal. All Reviews for Fragrant South Indian Beef Curry. Traditional and authentic north Indian (Punjabi) style Bhuna Masala or Indian red curry masala paste - the perfect base for any Indian curry recipe. · This authentic Indian Instant Pot chicken curry is a delicious family recipe. See recipes for Paruppu Urundai Kuzhambu / South Indian Toor dal Kofta Curry too. Slow cooked beef curry. impress your guest with my grandmother's authentic Sri Lankan beef curry.
To get ingredients for manufacture Authentic Indian-Style Beef Curry recipes is also not difficult. You can easily get the main ingredients at the proximate supermarket and even on the market. There are ample types of Authentic Indian-Style Beef Curry that are convenient and fast to process into delicious serving. You can always practice this Authentic Indian-Style Beef Curry recipe at home, and can serve it to your children and extended family. If you wish to cook another foods on our website, we provide sundry types of food recipes which are of course very delicious and enjoyable to enjoy, please try them.
Recipe: Perfect Easy & Luxurious Healthy Gomoku Chirashi Sushi For Hina Matsuri (Doll Festival)
Easy & Luxurious Healthy Gomoku Chirashi Sushi For Hina Matsuri (Doll Festival). easy [ˈi:zɪ]Прилагательное. easy / easier / easiest. From Middle English eesy, esy, partly from Middle English ese ("ease") + -y, equivalent to ease + -y, and partly from Old French aisié ("eased, at ease, at leisure"), past participle of aisier ("to put at ease"), from aise ("empty space, elbow room, opportunity". Easy (TV series), an American comedy-drama anthology series.
 Easy definition, not hard or difficult; requiring no great labor or effort: a book that is easy to read; an effortlessly clear and fluent: an easy style of writing. readily comprehended or mastered: an easy. Requiring or exhibiting little effort or endeavor; undemanding: took the easy way out of her. Provided to YouTube by Stem Disintermedia Inc. Easy & Luxurious Healthy Gomoku Chirashi Sushi For Hina Matsuri (Doll Festival) very diverse and have ideal taste that unique. Some kinds of Easy & Luxurious Healthy Gomoku Chirashi Sushi For Hina Matsuri (Doll Festival) recipes are also adequate convenient to process and do not take long. Although not everyone likes Easy & Luxurious Healthy Gomoku Chirashi Sushi For Hina Matsuri (Doll Festival) food, currently few people are got attached and like the sundry Easy & Luxurious Healthy Gomoku Chirashi Sushi For Hina Matsuri (Doll Festival) foods on hand. This can be seen than the number of restaurants that prepare Easy & Luxurious Healthy Gomoku Chirashi Sushi For Hina Matsuri (Doll Festival) as one of the dishes. You can cook Easy & Luxurious Healthy Gomoku Chirashi Sushi For Hina Matsuri (Doll Festival) using 16 ingredients and 10 steps. Here is how you cook that.
Ingredients of Easy & Luxurious Healthy Gomoku Chirashi Sushi For Hina Matsuri (Doll Festival)
- Prepare 720 ml of White rice.
- Prepare 1 of sheet, Kombu seaweed (2 x 3 cm square).
- It's 80 ml of Sushi vinegar.
- Prepare 1 of section, large Lotus root.
- It's 50 ml of Rice vinegar (https://cookpad.com/en/recipes/188413-my-sushi-vinegar-recipe?ref=search).
- It's 2 of ○Eggs.
- It's 2 tsp of ○Sugar.
- Prepare 1 tsp of or less ○Katakuriko slurry.
- You need 1 pinch of ○Salt.
- It's 2 of Aburaage.
- You need 4 small of ones Dried shiitake mushrooms.
- It's 1 small of one Carrot.
- Prepare 3 tbsp of Sugar.
- It's 2 tbsp of Soy sauce.
- You need 1 of Sesame seeds (to taste).
- It's 1 of Green garnishes like mangetouts or mizuna leaves (as needed).
How to use easy in a sentence. The command of "EASY!" is pronounced with the accent on both syllables (EEE'-ZEE'), as opposed to the traditional word easy, in which only the first syllable is accented. easyGroup is the private investment vehicle of Stelios and the creator and owner of the easy family of brands. Keep up with all the brands here. Easy, la empresa líder especializada en venta de productos y servicios para la construcción, remodelación, decoración, diseño y equipamiento de la casa y el jardín.
Easy & Luxurious Healthy Gomoku Chirashi Sushi For Hina Matsuri (Doll Festival) step by step
- Rehydrate the shiitake mushrooms. Reserve the soaking water. Pour hot water over the aburaage to remove the excess oil..
- Add the konbu seaweed and cook the rice with less water than usual..
- Peel the lotus root and slice into thin quarters. Blanch in boiling water quickly and mix with rice vinegar while hot..
- Julienne the carrot. Cut the aburaage in half and slice thinly. Thinly slice the rehydrated shiitake mushrooms. I used Kyoto carrots (they're deeper in colour than usual carrots, almost red). The rice will look better that way, so use them if you can find them where you are..
- Heat vegetable oil in a pot and fry the carrot. After it wilts, add sugar. After the carrot is coated with sugar, add soy sauce, shiitake and aburaage and fry further. Add water you used to re-hydrate the shiitake and bring to a boil. Turn the heat off and leave to cool to allow the ingredients to absorb the flavour of the seasonings..
- Add the ○ ingredients to the beaten eggs and mix well. Make thin omelettes. After it cools, slice thinly to make kinshi-tamago. If you add the katakuriko slurry to the egg mixture before cooking, the omelettes won't break apart easily..
- After the rice is cooked, do not stir. Transfer to a moistened sushi wooden barrel straight away. Mix in the sushi vinegar quickly. It's important to cook the rice slightly harder than usual. Normally we use a fan to cool down the sushi rice quickly but it's a lot of work so instead I use the cold air setting of a hair dryer (laugh)..
- Mix in the lotus root from Step 3 into the sushi rice and scatter sesame seeds. Place the cooled toppings from Step 5 and kinshi-tamago from Step 6. During Step 8, do not pour in any cooking liquid from Step 5. It will make the dish soggy. For 4 rice cooker cups of rice (720 ml)..
- Place the green garnishes on top. I used baby chrysanthemum greens from my garden. Salad cress, quickly blanched mangetouts or mizuna leaves would be nice too..
- Each person can portion out however much they want, so it's a great dish for parties and events..
To get ingredients for production Easy & Luxurious Healthy Gomoku Chirashi Sushi For Hina Matsuri (Doll Festival) recipes is also not hard. You can easily get the main ingredients at the closest supermarket and even on the market. There are many kinds of Easy & Luxurious Healthy Gomoku Chirashi Sushi For Hina Matsuri (Doll Festival) that are easy and fast to process into delicious serving. You can always practice this Easy & Luxurious Healthy Gomoku Chirashi Sushi For Hina Matsuri (Doll Festival) recipe at home, and can presenting it to your children and extended family. If you wish to cook another foods on our website, we prepare sundry types of food recipes which are of certainly very delicious and enjoyable to enjoy, please try they.
Recipe: Tasty Homemade Sushi-Vegetarian Sushi [Easy & Delicious Sushi Recipe]
Homemade Sushi-Vegetarian Sushi [Easy & Delicious Sushi Recipe].
![Homemade Sushi-Vegetarian Sushi [Easy & Delicious Sushi Recipe]](https://img-global.cpcdn.com/recipes/22f634776106278d/680x482cq70/homemade-sushi-vegetarian-sushi-easy-delicious-sushi-recipe-recipe-main-photo.jpg) Homemade Sushi-Vegetarian Sushi [Easy & Delicious Sushi Recipe] very diverse and have ideal flavor that unique. Some kinds of Homemade Sushi-Vegetarian Sushi [Easy & Delicious Sushi Recipe] recipes are also adequate convenient to process and dont pick up lengthy. Even though not everybody likes Homemade Sushi-Vegetarian Sushi [Easy & Delicious Sushi Recipe] food, currently few people are get attached and like the various Homemade Sushi-Vegetarian Sushi [Easy & Delicious Sushi Recipe] foods on hand. This could be visible from the number of restaurants that provide Homemade Sushi-Vegetarian Sushi [Easy & Delicious Sushi Recipe] as one of the serving. You can have Homemade Sushi-Vegetarian Sushi [Easy & Delicious Sushi Recipe] using 5 ingredients and 4 steps. Here is how you cook that.
Homemade Sushi-Vegetarian Sushi [Easy & Delicious Sushi Recipe] very diverse and have ideal flavor that unique. Some kinds of Homemade Sushi-Vegetarian Sushi [Easy & Delicious Sushi Recipe] recipes are also adequate convenient to process and dont pick up lengthy. Even though not everybody likes Homemade Sushi-Vegetarian Sushi [Easy & Delicious Sushi Recipe] food, currently few people are get attached and like the various Homemade Sushi-Vegetarian Sushi [Easy & Delicious Sushi Recipe] foods on hand. This could be visible from the number of restaurants that provide Homemade Sushi-Vegetarian Sushi [Easy & Delicious Sushi Recipe] as one of the serving. You can have Homemade Sushi-Vegetarian Sushi [Easy & Delicious Sushi Recipe] using 5 ingredients and 4 steps. Here is how you cook that.
Ingredients of Homemade Sushi-Vegetarian Sushi [Easy & Delicious Sushi Recipe]
- Prepare 630 g of Japanese rice.
- It's 0.8 liters of water.
- It's 8 ml of rice vinegar.
- You need 3 tablespoons of sugar.
- Prepare 1 teaspoon of salt.
Homemade Sushi-Vegetarian Sushi [Easy & Delicious Sushi Recipe] step by step
- Put the rice in a large bowl, wash with cold water. Wash and drain the water until the water is clear. Pour the rice into a soup strainer and set aside for 30 minutes to allow it to drip well..
- Put the rice in a pan and add the water. Let the rice soak in cold water for at least 30 minutes. Light it underneath and cook in boiled water for 15 minutes..
- Make sushi vinegar. Mix rice vinegar, sugar, and salt in a bowl. Pour the whole into a small pan and heat until the sugar is completely dissolved. Cool the mixture..
- Put the hot steamed rice on a large plate. Do not use a metallic container as it will prevent the interaction of rice and vinegar. The best would be a wooden plate. Sprinkle the rice with the vinegar mixture and mix quickly with a shamoji (rice spatula). Be careful not to crush the rice grains. Refrigerate and immediately make the sushi out of it..
Got ingredients for manufacture Homemade Sushi-Vegetarian Sushi [Easy & Delicious Sushi Recipe] recipes is also not difficult. You can easily get the main ingredients at the closest supermarket and even on the market. There are ample kinds of Homemade Sushi-Vegetarian Sushi [Easy & Delicious Sushi Recipe] that are simple and fast to process into delicious dish. You can always praxis this Homemade Sushi-Vegetarian Sushi [Easy & Delicious Sushi Recipe] recipe at home, and can serve it to your children and extended family. If you want to cook other foods on our website, we prepare various types of food recipes which are of certainly very delicious and enjoyable to enjoy, please try them.
How to Cook Tasty Vanilla Christmas Layer Cake with Creamy Vanilla Buttercream Frosting
Vanilla Christmas Layer Cake with Creamy Vanilla Buttercream Frosting. This vanilla sheet cake recipe uses the reverse creaming method, an easy technique that promises a uniquely Top the cake with whipped vanilla buttercream, a frosting made from butter The photo on the left (below) is our sheet cake batter. I promise it's the creamiest batter you'll ever work with. PLEASE READ METhis is a Easy Vanilla Cake recipe with Easy Vanilla Buttercream Frosting.
 Preparation In a medium-size saucepan, whisk the flour into the milk until smooth. The Vanilla Buttercream Frosting makes it special. When cake layers are completely cool, transfer to cake plate and frost with vanilla buttercream. (I always flip the bottom layer of the cake so that the domed side is facing down and touching the plate. Vanilla Christmas Layer Cake with Creamy Vanilla Buttercream Frosting very diverse and have mind flavor that unique. Several kinds of Vanilla Christmas Layer Cake with Creamy Vanilla Buttercream Frosting recipes are also enough easy to process and do not take long. Though not everyone likes Vanilla Christmas Layer Cake with Creamy Vanilla Buttercream Frosting food, currently few people are getting attached and like the sundry Vanilla Christmas Layer Cake with Creamy Vanilla Buttercream Frosting foods available. This can be seen from the number of restaurants that provide Vanilla Christmas Layer Cake with Creamy Vanilla Buttercream Frosting as one of the dish. You can have Vanilla Christmas Layer Cake with Creamy Vanilla Buttercream Frosting using 15 ingredients and 15 steps. Here is how you cook it.
Ingredients of Vanilla Christmas Layer Cake with Creamy Vanilla Buttercream Frosting
- You need of CAKE.
- You need 3 cup of cake flour.
- Prepare 1 tbsp of baking powder.
- You need 1/4 tsp of baking soda.
- Prepare 1/2 tsp of salt.
- Prepare 1 2/3 cup of unsalted butter, melted.
- It's 1 1/2 cup of granulated sugar.
- Prepare 2 tsp of vanilla extract.
- Prepare 2/3 cup of milk, I used whole milk.
- Prepare 4 of large eggs.
- Prepare of red food coloring.
- Prepare of FROSTING AND FILLING.
- Prepare 1 1/2 of recipes for my Basic Creamy Buttercream Frosting, recipe attached in direction step #7.
- Prepare of GARNISH.
- You need of red, green and white sprinkles.
That way, the surface that you're icing is flat and will minimize any separating between the two layers. Spread frosting on each layer, stack layers and cover with frosting. Thick layers of vanilla cake and my favorite vanilla frosting. It's an easy, oil-based vanilla cake.
Vanilla Christmas Layer Cake with Creamy Vanilla Buttercream Frosting instructions
- Preheat the oven to 350. Spray 3 - 8 inche cake pans with bakers sprspray.
- Whisk together in a bowl flour, baking powder, baking soda and salt.
- In another bowl beat butter and sugar until creamy, add flour and milk and give a stir to moisten, then beat in eggs and vanilla, add flour mixture and stir to blend.
- Remove 1/3 of the batter to a seperate bowl, this will be your white layer. To the remaining batter, add enough drops of red food color to get a vivid red. Pour red batter into 2 of the prepared pans and the white batter in the remaining third pan.
- Bake about 12 to 15 minutes just until a toothpick comes out clean. Cool on racks in pans 10 minutes , then remove and cool completely before frosting.
- MAKE FROSTING AND FILLING.
- Make 1 1/2 recipes of my Basic Creamy Buttercream frosting in order to have enough to fill and frost the entire cake. Recipe attached below. Use 1 1/2 cup butter and 6 cups confectioner's sugar, adding more cream as needed, see tip in recipe for perfect light creamy frosting https://cookpad.com/us/recipes/367337-basic-creamy-vanilla-buttercream-frosting.
- ASSEMBLE CAKE.
- Place one cooled red layer of cake bottom side up on serving plate.
- Frost with some of the vanilla buttercream frosting.
- Add the white layer, bottom side up.
- Frost with some frostung.
- Top with the second red layer of cake, bottom up.
- Frost entire cake with tthe frosting.
- Garnish cake with sprinkles. Chill cake for 2 hours for easy slicing.
My secrets to making the perfect vanilla buttercream for frosting cakes is starting with COLD butter. This allows you to control the consistency of your frosting, and prevents the butter from getting too. If you share this Vanilla Buttercream Frosting or any other recipe from my site on Instagram, tag Beat the softened butter over medium speed with an electric mixer until soft and creamy. Once butter and sugar have come together, add the vanilla. Our simple two-layer cake with vanilla frosting doesn't come with any extra frills—just a classic cake sure to Beat together butter and cream cheese with a mixer on medium-high speed until pale and creamy My new favorite vanilla cake recipe.
To get ingredients for manufacture Vanilla Christmas Layer Cake with Creamy Vanilla Buttercream Frosting recipes is also not hard. You can easily get the main ingredients at the closest supermarket and even on the market. There are ample types of Vanilla Christmas Layer Cake with Creamy Vanilla Buttercream Frosting that are easy and quick to process into delicious dishes. You can constantly praxis this Vanilla Christmas Layer Cake with Creamy Vanilla Buttercream Frosting recipe at home, and can provide it to your children and extended family. If you wish to cook other foods on our website, we supply various types of food recipes which are of certainly very delicious and enjoyable to enjoy, please try their.
Recipe: Perfect Hans' first sponge cake💜
Hans' first sponge cake💜. SpongeBob might still have the Suds if not for Hans! Who else could give a proper "sponge treatment"? Here's every time Hans the Hand appears in SpongeBob.
 This Japanese cotton sponge cake recipe shows you all the details of how to make the most cottony The most common reason when the sponge cake is still uncooked after baking one hour is due to Hi, attempted your recipe. But what came out was exactly one third (the base) was. Sponge cake is a light cake made with egg whites, flour and sugar, sometimes leavened with baking powder. Hans' first sponge cake💜 highly diverse and have mind flavor that unique. Some kinds of Hans' first sponge cake💜 recipes are also sufficient easy to process and dont pick up long. Though not everyone likes Hans' first sponge cake💜 food, currently few people are get attached and like the sundry Hans' first sponge cake💜 foods on hand. This could be visible of the number of restaurants that supply Hans' first sponge cake💜 as one of the dishes. You can cook Hans' first sponge cake💜 using 5 ingredients and 5 steps. Here is how you achieve it.
Ingredients of Hans' first sponge cake💜
- You need 250 g of cake mix.
- Prepare 60 ml of water.
- It's 2 of eggs.
- You need 1 teaspoon of vanilla essence.
- Prepare 60 gm of melted butter.
Sponge cakes, leavened with beaten eggs, originated during the Renaissance. Eggless Sponge Cake Recipe, Sponge Cake Step by Step - Edible Garden. Eggless Sponge Cake Recipe by Nags The Cook, via Flickr - a one bowl and fuss free recipe with no eggs. I love this sponge cake recipe.
Hans' first sponge cake💜 step by step
- Whisk on top speed cake mix, eggs, essence vanilla and water for 5-6 minutes.
- Pour in the melted butter.
- Pour the batter in a greased 9" round mould.
- Heat the oven for 6 minutes at 180° degree.
- Bake the cake for 35-40 minutes at 180° degree.
It's easy and you can make hundreds of different cakes with this base. came across this sponge cake recipe and tried it immediately as it was easy and guess what i made my first sponge cake. I loved it but the egg was a lil over powering , how can i lower it a bit. Sponge cakes taste good eaten plain, served with sweetened fruit, or iced with a simple glaze. Sponge cake is a food item that appears in the episodes "To Save a Squirrel" and "InSPONGEiac," as well as the video game SpongeBob vs. The Big One: Beach Party Cook-Off and the online game Cooking Contest, though it is first mentioned in "Blackened Sponge.".
To get ingredients for production Hans' first sponge cake💜 recipes is also not hard. You can easily get the main ingredients at the proximate supermarket and even on the market. There are ample types of Hans' first sponge cake💜 that are easy and fast to process into delicious dish. You can constantly practice this Hans' first sponge cake💜 recipe at home, and can serve it to your children and extended family. If you want to cook another foods on our website, we provide various types of food recipes which are of course very delicious and enjoyable to enjoy, please try they.
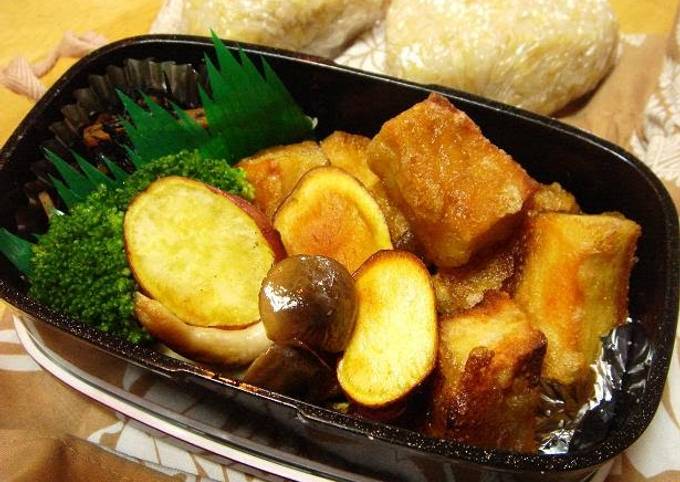
Easiest Way to Prepare Perfect Very Easy Macrobiotic Recipe Fried Koya Dofu
Very Easy Macrobiotic Recipe Fried Koya Dofu. I usually do this before going to bed, and cook it the next morning. The Pokemon Koya Dofu were so cute, so we couldn't help but think of making them into sweets. This is a very simple, but very delicious and colourful dish that can be made at any time of the year.
 See more ideas about Macrobiotic, Whole food recipes, Food. · This "tieban dofu," or griddled tofu steak, using Xinjiang spices like cumin and chili. Amaranth flour and sesame seeds give the perfect nutty crunchy coating to fried tofu in this easy string beans stir fry. This vibrant macrobiotic stir fry recipe will definitely become your favorite macrobiotic meal! Very Easy Macrobiotic Recipe Fried Koya Dofu very diverse and own ideal flavor that unique. Few kinds of Very Easy Macrobiotic Recipe Fried Koya Dofu recipes are also enough easy to process and dont pick up long. Although not everyone likes Very Easy Macrobiotic Recipe Fried Koya Dofu food, nowadays some people are get attached and like the various Very Easy Macrobiotic Recipe Fried Koya Dofu foods available. This can be visible from the number of restaurants that provide Very Easy Macrobiotic Recipe Fried Koya Dofu as one of the dish. You can have Very Easy Macrobiotic Recipe Fried Koya Dofu using 9 ingredients and 4 steps. Here is how you achieve that.
Ingredients of Very Easy Macrobiotic Recipe Fried Koya Dofu
- Prepare 10 of cm square Koya dofu.
- Prepare 50 ml of ○Dashi stock made of kombu & dried shiitake (or water).
- It's 1 tbsp of ○Soy sauce.
- It's 1/2 tbsp of ○Mirin.
- You need 1/2 tbsp of ○Cooking sake.
- You need 1 dash of ○Grated ginger.
- You need 1 dash of ○Grated garlic.
- You need 4 tbsp of Katakuriko.
- You need 1 of Canola oil.
It's not only easy to make, but also delicious! I feel so much better since starting eating clean again. This macrobiotic stir fry recipe is very easy to make and you can change some of the ingredients and. Recipes - Vegan, Macrobiotic & Japanese.
Very Easy Macrobiotic Recipe Fried Koya Dofu step by step
- Mix the ○ seasoning ingredients along with the ginger, and garlic..
- Soak the koya dofu in the Step 1 sauce for about 10 minutes. I usually do this before going to bed, and cook it the next morning. The koya dofu absorbs the flavour really well, so I recommend it!.
- Cut into bite-sized pieces, and coat with katakuriko..
- Lightly shallow-fry in canola oil, and it's done!.
We have created a deliciously versatile and umami-rich Vegan Gravy recipe using our award-winning Organic Brown Rice Miso. Combine the dry ingredients in a bowl. Gradually add soy milk, a small amount at a time. Pour the batter in to the muffin cups. Place them in a steaming steamer.
Obtain ingredients for making Very Easy Macrobiotic Recipe Fried Koya Dofu recipes is also not tough. You can easily get the main ingredients at the closest supermarket and indeed on the market. There are much types of Very Easy Macrobiotic Recipe Fried Koya Dofu that are easy and fast to process into delicious dishes. You can constantly praxis this Very Easy Macrobiotic Recipe Fried Koya Dofu recipe at home, and can provide it to your children and extended family. If you wish to cook other foods on our website, we provide sundry types of food recipes which are of course very delicious and enjoyable to enjoy, please try their.
Recipe: Yummy Grilled chicken with vinegar and miso (tori no amamiso sauce)
Grilled chicken with vinegar and miso (tori no amamiso sauce). In this video I show how to make Tori No Ama Miso Ae which is the Japanese recipe for grilled chicken in sweet miso sauce. Very easy to cook and tastes. This is one of my favorite soups to make!
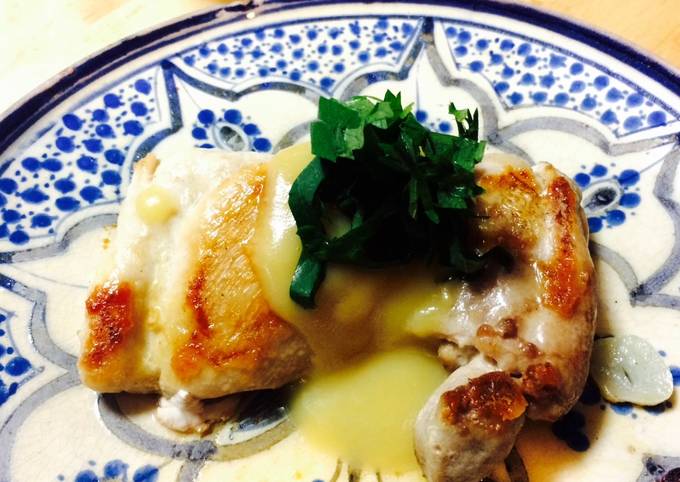 Serve this Miso Chicken with a side vegetable or over steamed rice, and miso soup, you'll be rewarded with a wholesome meal Marinated in a homemade all-purpose miso sauce and pan-fried till crispy, this Miso Chicken is very moist, flavorful, and delicious. Ideal for a quick weeknight meal. For grilled chicken recipes, I generally use chicken thighs because it is more flavorful and juicier than chicken breasts. Grilled chicken with vinegar and miso (tori no amamiso sauce) highly diverse and have mind flavor that unique. Some kinds of Grilled chicken with vinegar and miso (tori no amamiso sauce) recipes are also adequate simple to process and dont pick up lengthy. Even though not everybody likes Grilled chicken with vinegar and miso (tori no amamiso sauce) food, nowadays several people are got attached and like the sundry Grilled chicken with vinegar and miso (tori no amamiso sauce) foods available. This could be seen than the number of restaurants that supply Grilled chicken with vinegar and miso (tori no amamiso sauce) as one of the serving. You can cook Grilled chicken with vinegar and miso (tori no amamiso sauce) using 2 ingredients and 1 steps. Here is how you achieve it.
Ingredients of Grilled chicken with vinegar and miso (tori no amamiso sauce)
- It's 300 g of Chicken thigh.
- It's of Please see the first recipe called Leek and tuna salad with vinegar and miso (negi to magurono nuta) for the easy sauce:).
However, today I made Grilled Miso Chicken using chicken breasts, which can be just as good if you put your. You bought Miso paste, but don't know what to do with it other than Miso Soup? Marinading with Miso makes chicken tender and flavorful. And as usual, it is very easy to make!
Grilled chicken with vinegar and miso (tori no amamiso sauce) step by step
- Grill the chicken and drizzle the sauce!.
Just start earlier in the day or the night before to have enough time to marinade the chicken. Combine butter, miso, honey, rice vinegar and black pepper in a large bowl and mix with a spatula or spoon until it is well combined. Add chicken to the bowl and massage the miso-butter mixture all over it. Place the chicken in a single layer in a roasting pan and. Chicken Chicken Thighs Sauces Miso Main Dish Easy.
To get ingredients for manufacture Grilled chicken with vinegar and miso (tori no amamiso sauce) recipes is also not hard. You can easily get the main ingredients at the proximate supermarket and in fact on the market. There are many types of Grilled chicken with vinegar and miso (tori no amamiso sauce) that are convenient and fast to process into delicious dishes. You can constantly practice this Grilled chicken with vinegar and miso (tori no amamiso sauce) recipe at home, and can presenting it to your children and extended family. If you want to cook other foods on our website, we prepare sundry types of food recipes which are of course very delicious and enjoyable to enjoy, please try them.
Easiest Way to Make Delicious Pork Roast
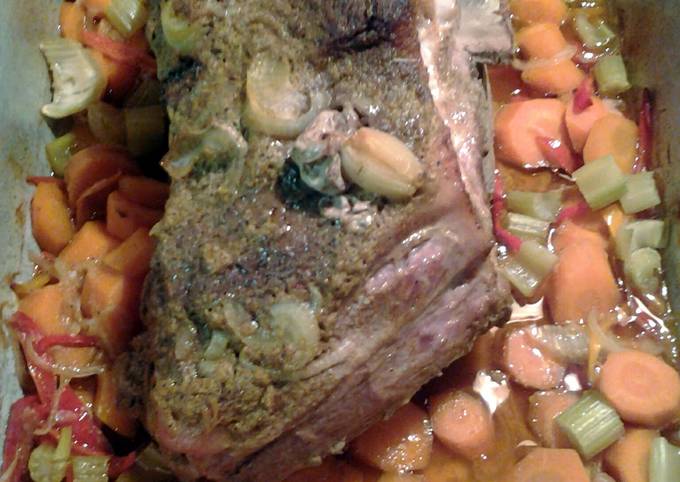
Pork Roast.
 Pork Roast most diverse and own mind flavor that unique. Several types of Pork Roast recipes are also sufficient simple to process and dont take long. Even though not everybody likes Pork Roast food, currently some people are got attached and like the various Pork Roast foods on hand. This could be visible from the number of restaurants that supply Pork Roast as one of the dishes. You can cook Pork Roast using 8 ingredients and 4 steps. Here is how you achieve it.
Ingredients of Pork Roast
- It's 7 lb of pork butt roast.
- You need 10 of pearl onions.
- It's 3/4 cup of skunks butt rub (see recipe).
- It's 3 of celery stalks washed and chopped.
- You need 3 of very long carrots chopped diagonal.
- You need 1 small of onion sliced thinly.
- Prepare 6 small of sweet multi colored sweet peppers.
- It's 1 cup of water.
Pork Roast instructions
- preheat oven 375°F Fahrenheit.
- slit the butt with a knife poke pearl onions into holes both sides put butt rub on non fat side of butt.
- fat side up poke pearl onions into slits there and put rub on.
- add vegetables all around butt add onions on top cover add bake 6 hours or done.
Got ingredients for making Pork Roast recipes is also not difficult. You can easily get the main ingredients at the proximate supermarket and indeed on the market. There are ample types of Pork Roast that are easy and quick to process into delicious dish. You can always praxis this Pork Roast recipe at home, and can provide it to your children and extended family. If you want to cook another foods on our website, we supply sundry types of food recipes which are of certainly very delicious and enjoyable to enjoy, please try they.
Recipe: Tasty Chicken pakoda
Chicken pakoda. Chicken pakoda can be made in various versions and here I would like to share two versions of making chicken pakoda which are absolutely delicious in taste and can be made any time of the day. chicken. The pakora is known also under other spellings including pikora, pakoda, pakodi and regional names such as bhaji and bhajiya. Crispy and juicy chicken pakora recipes for you to impress your guests and bring joy to your kids and The words "chicken pakora" can make me salivate instantly.
 Chicken Pakoda Recipe, How To Make Chicken Pakoda Recipe. Chicken pakoda is a traditional starter dish that can be served at kitty parties, feast and is also served as a main meal. Chicken Pakoda Recipe, Learn how to make Chicken Pakoda (absolutely delicious recipe of Chicken Pakoda ingredients and cooking method) About Chicken Pakoda Recipe: When it comes to. Chicken pakoda very diverse and own ideal flavor that unique. Several types of Chicken pakoda recipes are also adequate easy to process and dont take lengthy. Though not everyone likes Chicken pakoda food, now few people are get attached and like the sundry Chicken pakoda foods available. This could be seen of the number of restaurants that supply Chicken pakoda as one of the dishes. You can have Chicken pakoda using 10 ingredients and 3 steps. Here is how you cook that.
Ingredients of Chicken pakoda
- It's 500 gr of chicken.
- It's 1 tbsp of ginger garlic paste.
- You need 1 tbsp of garam masala 1 tablespoon.
- You need 2 tablespoons of Kashmir chilli powder.
- Prepare to taste of salt.
- You need 2 tbsp of chickpea flour.
- Prepare 2 tbsp of rice flour.
- It's 2 tbsp of coriander leaves, chopped.
- It's 2 tbsp of curry leaves, chopped.
- Prepare 1 of lemon, squeezed.
Chicken Pakoda is a yummy appetizer and a very common street food in tamil nadu. Now that the weather is gloomy some hot hot pakoras and chai will be a perfect delight. Spicy Chicken Pakoda recipe perfect for parties. There are three ingredients that make for Tamilnadu style Pakoda.
Chicken pakoda instructions
- Marinade the chicken with all the above ingredients in a bowl and rest for one to two hour in the fridge..
- Later in a pan take oil to deep fry the chicken pakoda in a pan and fry them evenly on medium to high flame until golden brown colour..
- Serve hot with lemon squeezed onion.
Spicy Chicken Pakora is the most hot favorite snacks in all over India or in India Cuisine. Here is the recipe of Chicken Pakora or Pakoda. Chicken pakora (pakoda) is a crispy and crunchy appetizer, also it is a quick evening snack. A crispy finger food for parties Text version of Chicken Pakora. Chicken Pakora/Pakoda Andhra street food style recipe.
Obtain ingredients for manufacture Chicken pakoda recipes is also not difficult. You can easily get the main ingredients at the nearest supermarket and in fact on the market. There are ample kinds of Chicken pakoda that are simple and fast to process into delicious serving. You can constantly practice this Chicken pakoda recipe at home, and can serve it to your children and extended family. If you want to cook other foods on our website, we prepare sundry types of food recipes which are of course very delicious and enjoyable to enjoy, please try them.
Recipe: Delicious Mongolian Lamb
Mongolian Lamb.
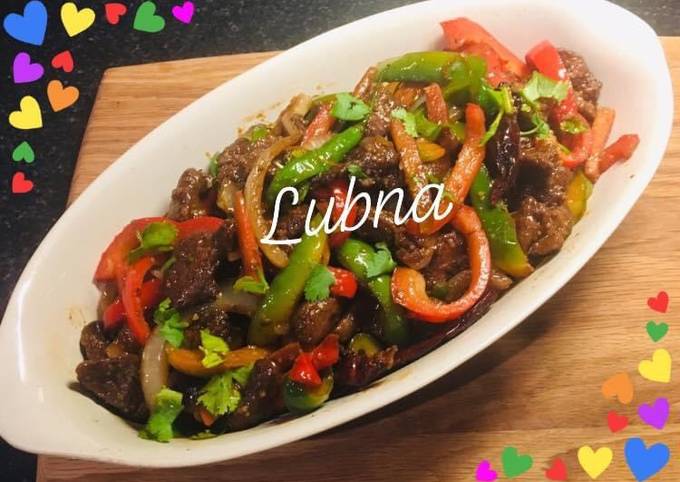 Mongolian Lamb very diverse and have mind flavor that unique. Few kinds of Mongolian Lamb recipes are also adequate simple to process and do not pick up long. Though not everyone likes Mongolian Lamb food, nowadays several people are get attached and like the various Mongolian Lamb foods on hand. This can be seen than the number of restaurants that provide Mongolian Lamb as one of the serving. You can have Mongolian Lamb using 17 ingredients and 2 steps. Here is how you cook it.
Ingredients of Mongolian Lamb
- Prepare of 🌻Marinade:.
- Prepare 1/2 Cup of soy sauce.
- Prepare 1/3 Cup of cornflour.
- Prepare 500 g of lamb leg steaks, trimmed, thinly sliced.
- You need 4 Tbsp of oil.
- Prepare 1-2 of egg white.
- You need of 🌻Sauce:.
- Prepare 1 of onion, cut into thin wedges.
- It's 2 of garlic cloves, finely chopped.
- You need of Small piece fresh ginger, finely grated.
- Prepare 2 of capsicums, (red & green)cut into strips.
- You need 1 Tbsp of oyster sauce.
- It's 2 Tbsp of hoisin sauce.
- You need 1 Tbsp of caster sugar.
- You need 1/2 tsp of sesame oil.
- You need 2 Tbsp of chilli sauce (optional).
- It's of Boiled rice, to serve.
Mongolian Lamb step by step
- Combine soy sauce, oil & cornflour in a glass or ceramic bowl. Add lamb. Toss to coat. Cover with plastic wrap. Refrigerate for 30 minutes, if time permits. Heat a wok over high heat. Add 2 teaspoons oil. Swirl to coat. Stir-fry a lamb for until browned and just cooked. Transfer to a bowl. Cover to keep warm. Repeat with oil and remaining lamb in 2 batches..
- Add remaining oil to wok over high heat. Swirl to coat. Add onion. Stir-fry for 2 minutes or until softened. Add garlic and ginger. Stir-fry for 1 minute or until fragrant. Add capsicum. Stir-fry for 2 minutes or until tender. Return lamb to wok. Add oyster sauce, hoisin sauce, sugar and sesame oil. Stir-fry for 1 to 2 minutes or until sauce has thickened. Serve with rice..
Obtain ingredients for manufacture Mongolian Lamb recipes is also not difficult. You can easily get the main ingredients at the closest supermarket and in fact on the market. There are ample types of Mongolian Lamb that are easy and fast to process into delicious dish. You can constantly praxis this Mongolian Lamb recipe at home, and can presenting it to your children and extended family. If you want to cook other foods on our website, we supply various types of food recipes which are of course very delicious and enjoyable to enjoy, please try their.
Recipe: Perfect NONE FOOD RECIPE - Onion Steam To Calm Pre-Flu Sympthom
NONE FOOD RECIPE - Onion Steam To Calm Pre-Flu Sympthom.
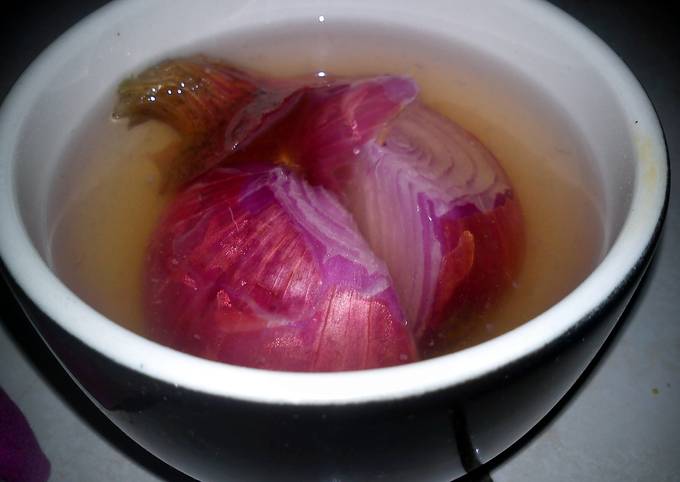 NONE FOOD RECIPE - Onion Steam To Calm Pre-Flu Sympthom most diverse and own ideal flavor that unique. Several types of NONE FOOD RECIPE - Onion Steam To Calm Pre-Flu Sympthom recipes are also adequate convenient to process and do not pick up lengthy. Even though not everybody likes NONE FOOD RECIPE - Onion Steam To Calm Pre-Flu Sympthom food, now some people are get attached and like the various NONE FOOD RECIPE - Onion Steam To Calm Pre-Flu Sympthom foods on hand. This could be seen from the number of restaurants that supply NONE FOOD RECIPE - Onion Steam To Calm Pre-Flu Sympthom as one of the dishes. You can cook NONE FOOD RECIPE - Onion Steam To Calm Pre-Flu Sympthom using 4 ingredients and 6 steps. Here is how you cook it.
Ingredients of NONE FOOD RECIPE - Onion Steam To Calm Pre-Flu Sympthom
- Prepare 1 of Bowl / Cup.
- Prepare 1 cup of - 2 Cup hot boiling water.
- It's 1 of Big red onion or a hand full of small red onion.
- You need 1 of Fresh tumeric.
NONE FOOD RECIPE - Onion Steam To Calm Pre-Flu Sympthom step by step
- Cut both bottom and top of the onion. Cut again the main into 4 pieces.
- Add in all pieces into the bowl / cup including the top and bottom.
- Add in the boiling water. Kept the bowl next to whoever has the flu sign.
- You can occasionally have them around you especiallly during rainy or cold day to prevent and calm the flu.
- You can grate some fresh tumeric and spread them thin on the nose trail to help and calm the flu away.
- Used to do this for my 25 month old toddler.
Got ingredients for manufacture NONE FOOD RECIPE - Onion Steam To Calm Pre-Flu Sympthom recipes is also not hard. You can easily get the main ingredients at the nearest supermarket and even on the market. There are ample kinds of NONE FOOD RECIPE - Onion Steam To Calm Pre-Flu Sympthom that are easy and fast to process into delicious serving. You can constantly praxis this NONE FOOD RECIPE - Onion Steam To Calm Pre-Flu Sympthom recipe at home, and can serve it to your children and extended family. If you wish to cook different foods on our website, we provide sundry types of food recipes which are of certainly very delicious and enjoyable to enjoy, please try their.
How to Prepare Perfect Vegan Steam Buns
Vegan Steam Buns.
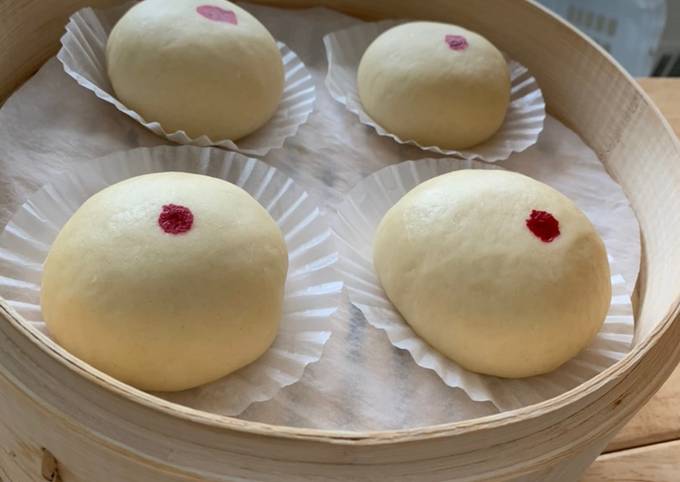 Vegan Steam Buns very diverse and have mind flavor that unique. Several kinds of Vegan Steam Buns recipes are also enough easy to process and do not pick up lengthy. Although not everybody likes Vegan Steam Buns food, now few people are get attached and like the sundry Vegan Steam Buns foods on hand. This could be seen of the number of restaurants that prepare Vegan Steam Buns as one of the dish. You can cook Vegan Steam Buns using 8 ingredients and 12 steps. Here is how you achieve that.
Ingredients of Vegan Steam Buns
- It's 2 cups of all- purpose flour.
- It's 1 tbsp of wet yeast.
- You need 1 tsp of baking powder.
- You need 2 tbsp of olive oil.
- It's 150 ml of warm water.
- Prepare 1 tsp of sugar.
- It's of 1 pinch salt.
- You need of Chocolate chips.
Vegan Steam Buns step by step
- Add the wet yeast and the sugar into the warm water and stir until the yeast dissolves..
- Add flour, baking powder and salt to the mixing bowl and mix..
- Wet yeast doesn’t need to grow like dry yeast so we can use it right away..
- Add the yeast mixture to the dry ingredients along with olive oil and mix..
- After mixing everything together, take the dough out and place it on the counter where we’ll kneed it. We will kneed it for 10-15 minutes..
- Coat a mixing bowl with cooking oil and place the dough into it and then cover..
- Set aside for about 1 hour to let dough rise..
- Place the dough on the counter and cut into 6 pieces which we will shape into balls..
- Flatten the balls but make sure the middle is thicker..
- Place the chocolate chips in the middle and fold the sides of the dough over top the chocolate..
- Place into cupcake paper, cover and let rest for another 10 minutes..
- Steam for 15-20 minutes..
To get ingredients for manufacture Vegan Steam Buns recipes is also not difficult. You can easily get the main ingredients at the proximate supermarket and in fact on the market. There are ample kinds of Vegan Steam Buns that are simple and fast to process into delicious dishes. You can constantly praxis this Vegan Steam Buns recipe at home, and can presenting it to your children and extended family. If you wish to cook other foods on our website, we provide sundry types of food recipes which are of certainly very delicious and enjoyable to enjoy, please try them.
Easiest Way to Prepare Appetizing Goma-ae(Sesame Dressing)
Goma-ae(Sesame Dressing). Goma (胡麻) in Japanese means sesame seed and goma-ae (胡麻和え) is a dish that's dressed with the sesame sauce. The word ae (pronounced as [ah EH]. 和え) comes from the verb aeru ([ah EH loo]. 和える) which is to dress (the food with sauce). Spinach Gomaae as Easy Side Dish.
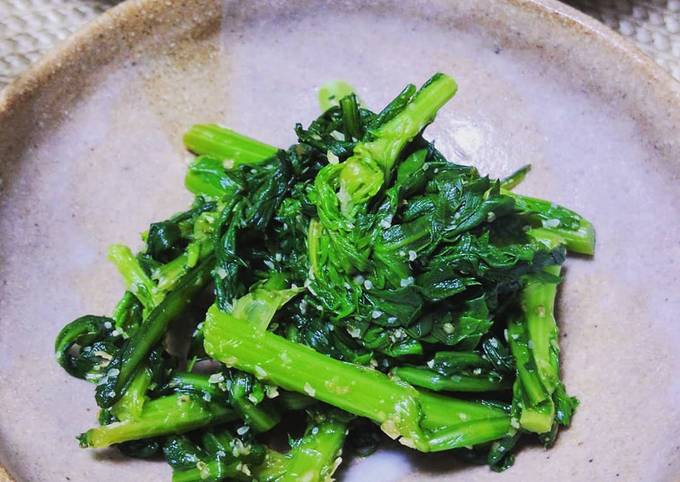 There are different types of white sesame seeds you can buy at Japanese/Asian. Goma-ae is a slightly sweet sesame soy sauce based dressing. At it's most basic level, it's made with three ingredients When seasoning your vegetables, goma-ae is not meant to be used heavily. Goma-ae(Sesame Dressing) highly diverse and have mind taste that unique. Some types of Goma-ae(Sesame Dressing) recipes are also enough convenient to process and do not take long. Although not everybody likes Goma-ae(Sesame Dressing) food, now several people are get attached and like the various Goma-ae(Sesame Dressing) foods available. This could be seen of the number of restaurants that supply Goma-ae(Sesame Dressing) as one of the serving. You can have Goma-ae(Sesame Dressing) using 6 ingredients and 5 steps. Here is how you cook that.
Ingredients of Goma-ae(Sesame Dressing)
- You need 1 handful of komatsuna.
- Prepare of Sesame (a little bit).
- Prepare 1 tablespoon of soy sauce.
- You need 1 tablespoon of mirin or sugar.
- You need 1 tablespoon of rice wine or water.
- Prepare of salt (a little bit).
So if you love slathering your dressing all over your salad (like I do), this won't be as saucy! Goma-ae (胡麻和え), sometimes also spelled Gomaae or Gomae is a Japanese side dish. It is made with vegetables and sesame dressing (goma meaning sesame and ae meaning sauce in Japanese). One of the most common versions, often found at Japanese restaurants in the West.
Goma-ae(Sesame Dressing) instructions
- First,put water in a pot and boil. And add a little salt.It is for boiling komatsuna(vegetables).Do not boil too much..
- Squeeze the water of boiled komatsuna.And cut into 3 cm width..
- Mix soy sauce, mirin and sake in the bowl.And put the cut Komatsuna there.Mix well..
- Please taste it.Optionally add salt.There are ground sesame and granular sesame.Please choose your favorite one.Finally add sesame and mix..
- Yes,it is finished..
Ingen Goma-ae (String Beans with Sesame Seasoning) いんげんのごま和え 作り方レシピ. How to make Japanese Spinach Goma-ae ⭐ Goma-ae (sometimes written as gomae, but I prefer the hyphenated spelling as it emphasizes the correct pronunciation) is a simple side made with lightly-cooked green vegetables and a sesame dressing, and it's one of the most commonly encountered items on any Japanese menu in North. Horenso no Goma-ae (spinach with sesame dressing). Japanese recipes call for blanching spinach in boiling water, and then plunging it into cold water to stop the cooking.
Got ingredients for making Goma-ae(Sesame Dressing) recipes is also not difficult. You can easily get the main ingredients at the nearest supermarket and even on the market. There are much kinds of Goma-ae(Sesame Dressing) that are easy and quick to process into delicious dishes. You can constantly practice this Goma-ae(Sesame Dressing) recipe at home, and can presenting it to your children and extended family. If you want to cook different foods on our website, we prepare sundry types of food recipes which are of course very delicious and enjoyable to enjoy, please try them.
Easiest Way to Make Tasty ‘Goma-ae’ Cucumber & Tuna
‘Goma-ae’ Cucumber & Tuna. 'Goma-ae', the dish of vegetables seasoned with sweet sesame seeds sauce is very popular with my family. I recently discovered fresh cucumber is also very tasty with 'Goma-ae' sauce.. Goma-ae (ほうれん草の胡麻和え) as it's a better-known dish in the U.
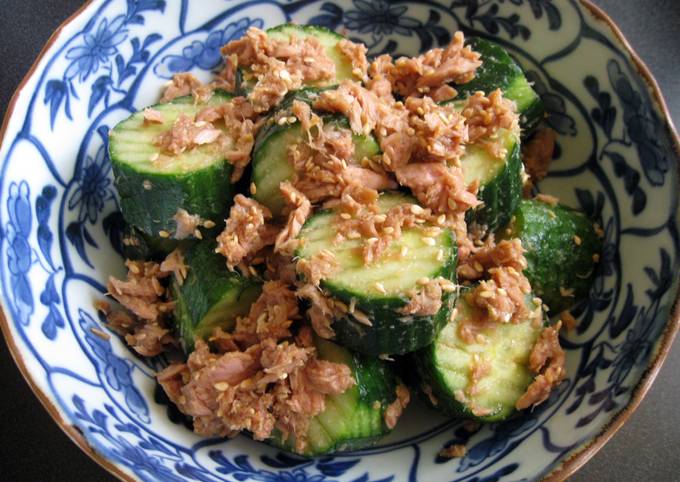 Goma-ae (胡麻和え), sometimes also spelled Gomaae or Gomae is a Japanese side dish. It is made with vegetables and sesame dressing (goma meaning sesame and ae meaning sauce in Japanese). One of the most common versions, often found at Japanese restaurants in the West. ‘Goma-ae’ Cucumber & Tuna highly diverse and have ideal taste that unique. Few kinds of ‘Goma-ae’ Cucumber & Tuna recipes are also adequate easy to process and dont take long. Though not everybody likes ‘Goma-ae’ Cucumber & Tuna food, nowadays few people are got attached and like the various ‘Goma-ae’ Cucumber & Tuna foods on hand. This can be seen from the number of restaurants that provide ‘Goma-ae’ Cucumber & Tuna as one of the dishes. You can have ‘Goma-ae’ Cucumber & Tuna using 8 ingredients and 3 steps. Here is how you cook it.
Ingredients of ‘Goma-ae’ Cucumber & Tuna
- Prepare 1 of Continental Cucumber *OR 2 Lebanese Cucumber.
- You need 1/4 teaspoon of Salt.
- Prepare 1 can (95 g) of Tuna *drained, I used Tuna in Springwater.
- You need of Goma-ae Sauce.
- Prepare 1 tablespoon of Toasted Sesame Seeds *ground.
- Prepare 1 tablespoon of Sugar.
- You need 1 tablespoon of Soy Sauce *alter the amount to suit your taste.
- You need of *Note: A little bit of Chilli or/and grated Ginger can be added.
Goma-ae is a popular Japanese side dish consisting of vegetables dressed with sesame sauce. The most popular goma-ae variety is made with spinach that is topped with sesame seeds and miso paste. Ingen Goma-ae (String Beans with Sesame Seasoning) いんげんのごま和え 作り方レシピ. How to make Japanese Spinach Goma-ae ⭐
‘Goma-ae’ Cucumber & Tuna step by step
- Cut Cucumber in bite-size pieces. Sprinkle Salt and toss to combine, then set aside. *Note: Today I cut the Cucumber in Snake cut. (see recipe).
- To make ‘Goma-ae’ sauce, toast Sesame Seeds in a saucepan until golden, then grind until aromatic. Do not over grind. Then add Sugar and Soy Sauce, and mix well. *Note: A little bit of Chilli or/and grated Ginger can be added..
- Combine Cucumber, drained Tuna and ‘Goma-ae’ Sauce..
Goma-ae (sometimes written as gomae, but I prefer the hyphenated spelling as it emphasizes the correct pronunciation) is a simple side made with lightly-cooked green vegetables and a sesame. Broccoli Rabe Goma-ae. by: Ali Slagle. This easy Japanese Cucumber Salad recipes makes a thunderously crunchy salad with a Sunomono (酢の物) literally means "vinegared thing" and refers to a Japanese cucumber salad. These cucumber seeds are organic and possess a high germination rate. Contribute to qmetry/qaf-cucumber development by creating an account on GitHub.
Got ingredients for making ‘Goma-ae’ Cucumber & Tuna recipes is also not difficult. You can easily get the main ingredients at the nearest supermarket and indeed on the market. There are many kinds of ‘Goma-ae’ Cucumber & Tuna that are easy and quick to process into delicious dishes. You can always practice this ‘Goma-ae’ Cucumber & Tuna recipe at home, and can provide it to your children and extended family. If you wish to cook another foods on our website, we prepare various types of food recipes which are of course very delicious and enjoyable to enjoy, please try their.
Recipe: Perfect 'Goma-ae' Tomatoes
'Goma-ae' Tomatoes. Goma-ae is a delicious way to eat many different vegetables. Ae translated implies a mix of seasonings that is then mixed with vegetables or other food. Goma-ae is a popular Japanese side dish consisting of vegetables dressed with sesame sauce.
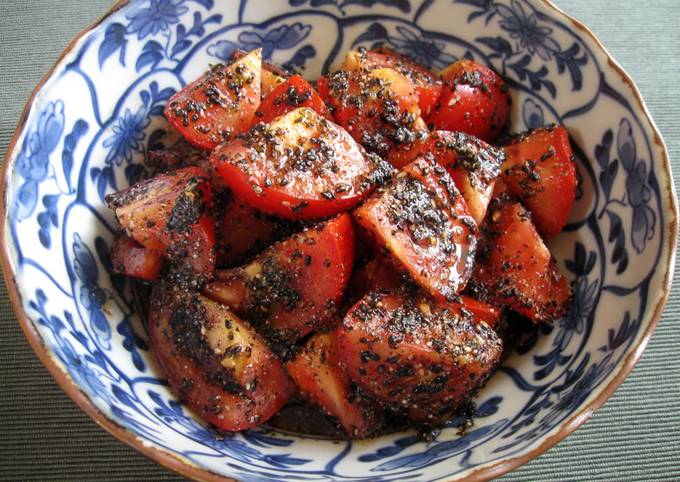 The definitive site for Reviews, Trailers, Showtimes, and Tickets. #goma ae #gomaae #Japanesse spinach salad #ASMR #Japanese cooking Goma ae is a clever Japanese way to eat more vegetables by dressing them with sesame seeds. Hourensou no goma-ae (菠薐草の胡麻和え) literally translates to "spinach dressed with sesame seeds". If that sounds simple, that's because it is. 'Goma-ae' Tomatoes highly diverse and own ideal sense that unique. Few types of 'Goma-ae' Tomatoes recipes are also adequate convenient to process and dont take long. Though not everybody likes 'Goma-ae' Tomatoes food, nowadays some people are get attached and like the various 'Goma-ae' Tomatoes foods available. This can be visible from the number of restaurants that supply 'Goma-ae' Tomatoes as one of the dishes. You can have 'Goma-ae' Tomatoes using 5 ingredients and 2 steps. Here is how you achieve that.
Ingredients of 'Goma-ae' Tomatoes
- You need 3-4 of Tomatoes.
- It's of <Goma-ae Sauce>.
- It's 2 tablespoons of Toasted Sesame Seeds *ground, black or white.
- It's 1 of & 1/2 tablespoons Sugar *usually 1 tablespoon, but extra sweetness suits Tomatoes.
- Prepare 2 tablespoons of Soy Sauce.
With only a handful of other ingredients, it's a quick. A wide variety of iran tomato paste options are available to you, such as preservation process, processing type, and style. When I say , "Tomato, Tomato, Potato, Potato" , I am meaning that I want to stick to the fundamental issue or topic that I am discussing and not get bogged down in a scuffle or beckoned down a bunny. Gomaae sometimes also spelled Gomaae or Gomae is a Japanese side dish It is made with vegetables and sesame dressing goma meaning sesame and ae mea.
'Goma-ae' Tomatoes instructions
- Grind Toasted Sesame Seeds, add Sugar and Soy Sauce and mix well to make sauce..
- Cut Tomatoes into chunky pieces and mix with sauce. Serve immediately..
Discover if tomatoes belong in a gout diet! Also do tomatoes lower uric acid or do they increase it? There is a misconception amongst certain gout sufferers that tomatoes actually cause gout attacks. Serving up Fresh and Rotten reviews for movies and TV. Follow us on Apple News for the latest.
Got ingredients for manufacture 'Goma-ae' Tomatoes recipes is also not difficult. You can easily get the main ingredients at the closest supermarket and even on the market. There are many types of 'Goma-ae' Tomatoes that are easy and fast to process into delicious serving. You can always praxis this 'Goma-ae' Tomatoes recipe at home, and can presenting it to your children and extended family. If you want to cook different foods on our website, we supply sundry types of food recipes which are of course very delicious and enjoyable to enjoy, please try them.
How to Prepare Tasty INCREDIBLY DELICIOUS stromboli
INCREDIBLY DELICIOUS stromboli. Dennis Malloy has a great stromboli recipe to share with you. Stromboli Italian style (Rolling the stromboli). This Stromboli Recipe includes an easy made from scratch pizza dough along with helpful hints on If you have never made a homemade Stromboli Recipe than you are in for one delectable treat.
 Delicious Stromboli (Sbarro Inspired): I love trying new food and variations of the classics. This is a recipe inspired by a fast food restaurant I like a lot: Sbarro. See more ideas about stromboli, stromboli recipe, recipes. INCREDIBLY DELICIOUS stromboli very diverse and have ideal sense that unique. Some types of INCREDIBLY DELICIOUS stromboli recipes are also adequate convenient to process and dont pick up lengthy. Although not everyone likes INCREDIBLY DELICIOUS stromboli food, currently several people are getting attached and like the sundry INCREDIBLY DELICIOUS stromboli foods available. This can be visible than the number of restaurants that supply INCREDIBLY DELICIOUS stromboli as one of the serving. You can cook INCREDIBLY DELICIOUS stromboli using 15 ingredients and 12 steps. Here is how you achieve that.
Ingredients of INCREDIBLY DELICIOUS stromboli
- It's of Dough.
- Prepare 1 of Best, easiest pizza dough recipe.
- It's of For the sauce.
- It's 2 clove of garlic, chopped.
- It's 2 large of fresh tomatoes, chopped.
- It's 3 tbsp of tomato paste.
- Prepare 1 of olive oil.
- It's 1 of salt.
- It's 1 of ground black pepper.
- Prepare of Filling.
- It's 2 of green peppers.
- Prepare 1 of mozzarella or cheese of your choice (preferably that melts).
- It's 1 of purple onion.
- You need 3 of finely chopped chives.
- It's 1 of OR ANY FILLING YOU DESIRE. Mushrooms, sausage, ham, etc...
Stromboli is a longtime family dinner favorite. Quick, easy and packed with flavor, there's no reason why you shouldn't be making this seriously delicious take on the cousin to pizza. Strombolis are an all time classic comfort food. We usually prefer a strombolis over pizza when we are really hungry and want something that will satisfy the hunger.
INCREDIBLY DELICIOUS stromboli step by step
- Grease a large pizza pan and set aside..
- Chop the chives, green peppers and red onions and slightly sauté them in olive oil. Set aside..
- For the sauce: drizzle olive oil on a deep pan and heat. Add garlic and tomatos and sauté for a few minutes without letting the garlic burn..
- Add tomato paste, 1/2 cup of water, salt and pepper to taste..
- Cook on high for 20 minutes adding water as it evaporates and sauce becomes thicker. Add water until desire consistency..
- Preheat oven to 350°F..
- Divide dough into 4 pieces. On a floured surface, roll the 4 pieces in a rectangular shape each to desired thickness..
- Place one dough rectangle on the pizza pan. Scoop desired sauce in a line in the middle on the rectangle, add desired amount of cheese, add the sautéed veggies, scoop an extra tablespoon of sauce..
- Fold the sides and close the cylinder. Turn the stromboli so that the folded sides are on the bottom being careful not to rip the dough..
- Repeat process with remaining 4 dough rectangles..
- You can add an egg wash, garlic powder, italian seasoning, butter, sesame seeds on top of the stromboli, or any topping you prefer. These are optional..
- Bake for around 30-40 mins depending on how fast your oven cooks..
Strombolis get the job done right! I'm from the Northeast and we like to add shredded lettuce and tomato to our stromboli ingredients It's actually the best-tasting stromboli ever! I don't like American cheese so I..this Italian Meat Stromboli recipe is an easy and delicious addition to your weeknight routine! Making this dish and this menu is a great excuse to get your kids in the kitchen and help make a fun and delicious meal they will truly enjoy. Homemade Stromboli; pizza sauce, sandwich pepperoni, genoa salami and ham is rolled up with This is our favorite homemade stromboli recipe!
Obtain ingredients for manufacture INCREDIBLY DELICIOUS stromboli recipes is also not tough. You can easily get the main ingredients at the closest supermarket and even on the market. There are much kinds of INCREDIBLY DELICIOUS stromboli that are simple and quick to process into delicious dishes. You can constantly practice this INCREDIBLY DELICIOUS stromboli recipe at home, and can presenting it to your children and extended family. If you wish to cook other foods on our website, we provide sundry types of food recipes which are of certainly very delicious and enjoyable to enjoy, please try they.
Recipe: Yummy Roast Pork Tenderloin wrapped with Pastrami and served with a Romano / Marscapone Cream Sauce
Roast Pork Tenderloin wrapped with Pastrami and served with a Romano / Marscapone Cream Sauce. Roast Pork Tenderloin wrapped with Pastrami and served with a Romano / Marscapone Cream Sauce. For Pork•whole pork tenderloin, trimmed of excess fat•very thin lean deli pastrami•my creamy mustard sauce, found in my profile and in search for my recipe•For Sauce•butter•heavy. A roasted pork tenderloin meets a mouth watering maple rosemary glaze and it's a match made in heaven.
 Juicy pork tenderloins are smothered in mustard and roasted to delicious perfection and lovingly served with homemade prune sauce. Easy and yummy pork tenderloin, melts in your mouth. You may use more or less sage according to your taste. Roast Pork Tenderloin wrapped with Pastrami and served with a Romano / Marscapone Cream Sauce very diverse and own ideal flavor that unique. Several types of Roast Pork Tenderloin wrapped with Pastrami and served with a Romano / Marscapone Cream Sauce recipes are also enough convenient to process and do not pick up lengthy. Even though not everybody likes Roast Pork Tenderloin wrapped with Pastrami and served with a Romano / Marscapone Cream Sauce food, currently few people are get attached and like the sundry Roast Pork Tenderloin wrapped with Pastrami and served with a Romano / Marscapone Cream Sauce foods available. This could be visible than the number of restaurants that prepare Roast Pork Tenderloin wrapped with Pastrami and served with a Romano / Marscapone Cream Sauce as one of the serving. You can cook Roast Pork Tenderloin wrapped with Pastrami and served with a Romano / Marscapone Cream Sauce using 16 ingredients and 14 steps. Here is how you cook it.
Ingredients of Roast Pork Tenderloin wrapped with Pastrami and served with a Romano / Marscapone Cream Sauce
- It's of For Pork.
- It's 1 of whole pork tenderloin, trimmed of excess fat.
- You need 1/4 pound of very thin lean deli pastrami.
- You need 1 tablespoon of my creamy mustard sauce, found in my profile and in search for my recipe.
- It's of For Sauce.
- You need 1/2 tablespoon of butter.
- You need 1 cup of heavy cream.
- Prepare 4 tablespoons of marscapone cheese.
- It's 1 teaspoon of fresh lemon juice.
- Prepare 1/2 teaspoon of black pepper and salt to taste.
- Prepare 1/4 teaspoon of italian seasomning.
- Prepare 2 of garlic cloves, minced.
- It's 1/2 cup of fresh grated romano cheese.
- Prepare 1 teaspoon of hot sauce, such as franks red hot.
- It's 1 tablespoon of fresh basil, chopped.
- You need 1 tablespoon of fresh parsley, chopped.
I never knew I liked sauerkraut so much! Serve with mashed potatoes and applesauce. Our perfect roasted pork tenderloin recipe guarantees juicy, fork-tender pork. If that's not enough Tender and super delicious!
Roast Pork Tenderloin wrapped with Pastrami and served with a Romano / Marscapone Cream Sauce instructions
- Preheat oven to 425. Line a baking pan with foil, spray foil well with non stick spray.
- Place pork tenderloin on a work surface and brush all over with mustard sauce.
- .
- Wrap pork with pastrami to cover, as shown below.
- .
- .
- .
- .
- Place seam down on prepared pan and roast about 20 to 25 minutes just until a internal temperature reaches 145 to 150. Remove to a platter, cover and let rest 10 to 15 minutes.
- .
- Make Sauce.
- In a sauce pan combine, butter, garlic, cream, marscapone, lemon, pepper, salt, italian seasoning and hot sauce, bring to a simmer and whisk smooth.
- Add the romano cheese and stir until melted. Add green onions, parsly and basil. Serve sauce with pork.
- .
I added some moscatel (sweet wine) and a teaspoon of sour cream to Smoky, creamy, and perfectly golden brown potatoes served with a ridiculously tasty potato salad… Here's an amazing recipe for cooking ultra-tender roasted pork tenderloin with a creamy mustard sauce! This is a quick one-pan recipe for making delicious roasted pork tenderloin with a savory mustard sauce. This can be substituted with similar cheeses like pecorino romano or asiago. This Roasted Pork Tenderloin is an easy way to prepare a lean protein for dinner that's flavorful How to Make Roasted Pork Tenderloin: This first step is optional, but I like to flavor the pork with a Cut the pork into slices, and serve. I like to collect any of the juices from the plate and put them into a.
To get ingredients for manufacture Roast Pork Tenderloin wrapped with Pastrami and served with a Romano / Marscapone Cream Sauce recipes is also not hard. You can easily get the main ingredients at the proximate supermarket and indeed on the market. There are ample kinds of Roast Pork Tenderloin wrapped with Pastrami and served with a Romano / Marscapone Cream Sauce that are easy and fast to process into delicious dishes. You can always practice this Roast Pork Tenderloin wrapped with Pastrami and served with a Romano / Marscapone Cream Sauce recipe at home, and can provide it to your children and extended family. If you want to cook another foods on our website, we provide various types of food recipes which are of certainly very delicious and enjoyable to enjoy, please try they.
How to Cook Delicious Paneer Bread Roll
Paneer Bread Roll.
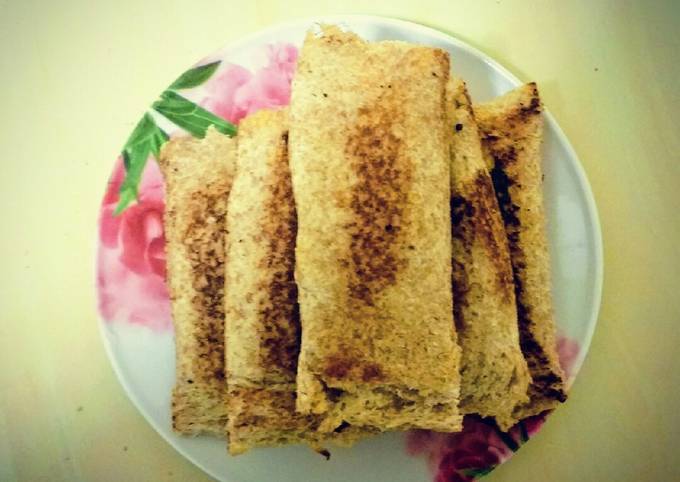 Paneer Bread Roll highly diverse and own mind flavor that unique. Some types of Paneer Bread Roll recipes are also sufficient easy to process and dont take lengthy. Although not everybody likes Paneer Bread Roll food, nowadays few people are getting attached and like the various Paneer Bread Roll foods on hand. This can be visible than the number of restaurants that prepare Paneer Bread Roll as one of the dish. You can cook Paneer Bread Roll using 18 ingredients and 4 steps. Here is how you achieve it.
Ingredients of Paneer Bread Roll
- You need of grated Paneer/Cottage Cheese.
- It's of Green Capsicum finely chopped.
- You need of small grated carrot.
- Prepare of boiled sweet corn.
- It's of green peas.
- Prepare of finely chopped coriander.
- You need of green chilli finely chopped.
- You need of ginger-garlic paste.
- It's of cumin powder.
- Prepare of red chilli powder.
- It's of crushed black pepper.
- It's of garam masala powder.
- You need of Salt.
- Prepare of Ajwain seeds/carom seeds (optional).
- You need of tomato sauce.
- It's of large brown/white bread slices.
- It's of Butter.
- It's of Mango chutney/green chutney.
Paneer Bread Roll step by step
- In a large bowl add paneer, capsicum, carrot, corn, peas, coriander, chilli, ginger-garlic paste and all the spices. Mix them very well. Stuffing is ready..
- Now take a bread slice and separate the sides. Roll the bread so that it will be thin..
- Add some mango/green chutney and spread to all over the bread. Now take some stuff in your palm and make a cylindrical shaped ball and place it on the chutney. Now roll the bread very well so that it will not be broken and form a good roll shape. Complete all the bread in a same manner..
- Heat a non stick pan and place 2-3 rolls at a time. Brush butter on the top of the roll. Flip them over and brush butter on the other side. Fry until golden brown. Serve them hot with chutney or without chutney..
Obtain ingredients for production Paneer Bread Roll recipes is also not tough. You can easily get the main ingredients at the closest supermarket and even on the market. There are much kinds of Paneer Bread Roll that are simple and fast to process into delicious dishes. You can always praxis this Paneer Bread Roll recipe at home, and can serve it to your children and extended family. If you wish to cook other foods on our website, we supply various types of food recipes which are of course very delicious and enjoyable to enjoy, please try them.
Recipe: Yummy Cheesy paneer popcorns
Cheesy paneer popcorns. Cheesy Paneer Popcorn Super easy & yummy Cheesy Paneer Pocorn which your kids & guests are going to love this New Year. Paneer popcorn - quick and easy snack for kids made with breaded paneer and deep These paneer popcorn are one of the best appetizers for kids - crunchy, delicious and. Popcorn Paneer is wonderful mini crispies, a lip-smacking snack made with fresh homemade cheese (paneer), mixed with spices fried and tossed with he.
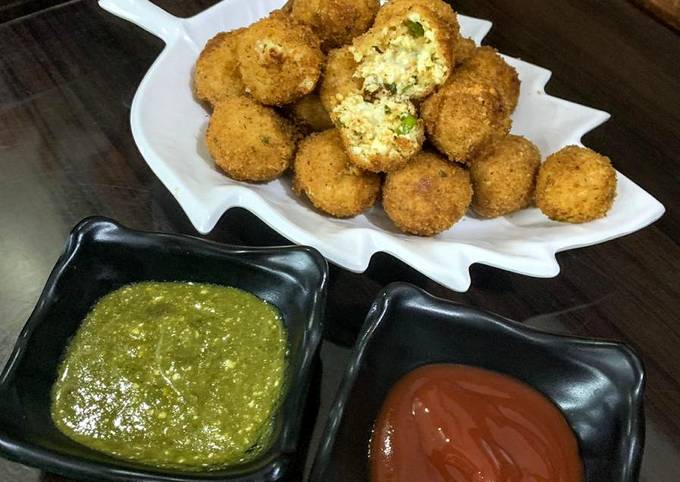 Paneer popcorn recipe- Crispy, crunchy and so tasty paneer popcorn with health ingredients. A tasty alternate of chicken popcorn for vegetarians! Paneer popcorns are one of my kids favorite food snack. Cheesy paneer popcorns very diverse and have mind flavor that unique. Several kinds of Cheesy paneer popcorns recipes are also adequate simple to process and dont take long. Though not everyone likes Cheesy paneer popcorns food, now some people are getting attached and like the sundry Cheesy paneer popcorns foods on hand. This can be visible from the number of restaurants that supply Cheesy paneer popcorns as one of the dish. You can cook Cheesy paneer popcorns using 12 ingredients and 10 steps. Here is how you cook that.
Ingredients of Cheesy paneer popcorns
- Prepare of cottage cheese (paneer).
- You need of cheese cubes.
- You need of refined flour.
- It's of bread crumbs.
- You need of salt.
- Prepare of black pepper powder.
- It's of chaat masala.
- Prepare of red pepper powder.
- Prepare of ginger.
- It's of green chillies.
- Prepare of chopped coriander leaves.
- It's of Oil for deep frying.
In fact paneer in any form is kid's favorite but these popcorns with mild spices make kids go gaga over them. the recipe for paneer popcorn is extremely simple as compared to it fancy name. to be honest the recipe followed in this recipe is almost similar to my previous potato bites recipe with some changes to. Masala Popcorn is spicy and flavorful. Enjoy masala popcorn while watching a movie or your Make the popcorn using the instruction over popcorn bag. Heat a large frying pan over low.
Cheesy paneer popcorns step by step
- Mashed paneer.
- Add chopped ginger, green chillies and coriander leaves.
- Add salt,both pepper powder and chaat masala.
- Mix well.
- Take small portion on palm and keep a tiny piece of cheese in it and close to make a small ball..
- Dip it in skirt made by refined flour and water.
- Now roll in bread crumbs all around..
- Make all like the same way..
- Now deep fry in oil on medium heat till golden.
- Now remove in a plate and serve hot.
Twisting the ball to compact the cheese into a block, place it on a plate with the twisted part of the. Crunchy Keto Popcorn Cheese Puffs are so tasty and perfect as a Low Carb snack. We bet you can't stop at a handful. Children will enjoy this over a weekend. Cheddar Cheese Popcorn is a great snack when you are in need of a salt fix!
Got ingredients for manufacture Cheesy paneer popcorns recipes is also not hard. You can easily get the main ingredients at the proximate supermarket and even on the market. There are many kinds of Cheesy paneer popcorns that are convenient and quick to process into delicious serving. You can constantly praxis this Cheesy paneer popcorns recipe at home, and can presenting it to your children and extended family. If you wish to cook different foods on our website, we supply sundry types of food recipes which are of certainly very delicious and enjoyable to enjoy, please try their.
Recipe: Appetizing Freddy's tasty hot dog recipe
Freddy's tasty hot dog recipe. A full ballpark experience from the comfort of your home! Using tongs, carefully place the battered dog into the hot oil, rotating it so that it frys evenly. Remove when golden brown, then pat with a paper towel to drain.
 From hot dogs loaded with mac 'n' cheese and mashed potatoes to classic corn dogs, these creative recipes will change the way you think about this street food fave. <p>Delicious street food meets home-cooked comfort food in this tasty dog topped with mini beef meatballs, fresh tomato sauce. Add the zesty flavors of a Greek salad to your hot dogs for a summer dish your guests won't soon forget. Get the recipe at Wanna Be a Country Cleaver. Freddy's tasty hot dog recipe highly diverse and own mind taste that unique. Few kinds of Freddy's tasty hot dog recipe recipes are also enough convenient to process and do not take long. Though not everybody likes Freddy's tasty hot dog recipe food, now few people are got attached and like the sundry Freddy's tasty hot dog recipe foods available. This can be visible than the number of restaurants that supply Freddy's tasty hot dog recipe as one of the serving. You can have Freddy's tasty hot dog recipe using 4 ingredients and 4 steps. Here is how you cook it.
Ingredients of Freddy's tasty hot dog recipe
- It's of Hebrew national hot dogs.
- You need of Hot dog rolls.
- It's of Diced onions.
- It's of Hunts diced tomatoes garlic flavor.
Reinvent the hot dog with a tasty Korean twist. In place of onions and ketchup, try kimchi and spicy mayonnaise topped with carrot and sesame seeds. We compare hot dog recipes from Gordon Ramsay, Chrissy Teigen, Matty Matheson, Tabitha Brown, and David Chang. Easy and mind blowingly tasty Chilli Coney Dog Recipe!
Freddy's tasty hot dog recipe instructions
- While dogs are cooking in a separate pan on medium high heat fry the hunts diced tomatoes garlic flavor. 5 minutes long enough to heat and warm tomatoes..
- Dice one small onion for toping..
- Assemble together hot dog in rolls onion on top of hot dog and tomatoes on top of onion..
- Enjoy!!!!.
Using tongs, carefully place the battered dog into the hot oil, rotating it so that it fries evenly. Get all the best Tasty recipes in your inbox! These aren't just any old hot dogs. Check out the various ways you can take your summer dog up a notch. Everyone loves a jalapeño popper, so why not combine that with a tasty hot dog.
Obtain ingredients for production Freddy's tasty hot dog recipe recipes is also not hard. You can easily get the main ingredients at the proximate supermarket and indeed on the market. There are many types of Freddy's tasty hot dog recipe that are convenient and fast to process into delicious dishes. You can constantly praxis this Freddy's tasty hot dog recipe recipe at home, and can serve it to your children and extended family. If you want to cook another foods on our website, we provide various types of food recipes which are of certainly very delicious and enjoyable to enjoy, please try their.
Easiest Way to Make Perfect Cookpad Logo Christmas Wreath Cake
Cookpad Logo Christmas Wreath Cake. Cookie Pie Cookie Bars Candy Cane Pie Candy Canes Christmas Time Christmas Wreaths Christmas Recipes Christmas Cookies Christmas Ideas. Find cake logo stock images in HD and millions of other royalty-free stock photos, illustrations and vectors in the Shutterstock collection. Thousands of new, high-quality pictures added every day.
![]() Vector Christmas greeting card with gifts, Christmas trees, toys and sweets. Whether you need a logo for your company Christmas party or your family Christmas dinner, we can help you create a unique and custom Christmas logo design in seconds. Create a professional christmas logo in minutes with our free christmas logo maker. Cookpad Logo Christmas Wreath Cake very diverse and own ideal flavor that unique. Few types of Cookpad Logo Christmas Wreath Cake recipes are also adequate convenient to process and dont pick up long. Although not everyone likes Cookpad Logo Christmas Wreath Cake food, now several people are got attached and like the various Cookpad Logo Christmas Wreath Cake foods on hand. This can be seen from the number of restaurants that provide Cookpad Logo Christmas Wreath Cake as one of the dishes. You can cook Cookpad Logo Christmas Wreath Cake using 15 ingredients and 31 steps. Here is how you achieve that.
Vector Christmas greeting card with gifts, Christmas trees, toys and sweets. Whether you need a logo for your company Christmas party or your family Christmas dinner, we can help you create a unique and custom Christmas logo design in seconds. Create a professional christmas logo in minutes with our free christmas logo maker. Cookpad Logo Christmas Wreath Cake very diverse and own ideal flavor that unique. Few types of Cookpad Logo Christmas Wreath Cake recipes are also adequate convenient to process and dont pick up long. Although not everyone likes Cookpad Logo Christmas Wreath Cake food, now several people are got attached and like the various Cookpad Logo Christmas Wreath Cake foods on hand. This can be seen from the number of restaurants that provide Cookpad Logo Christmas Wreath Cake as one of the dishes. You can cook Cookpad Logo Christmas Wreath Cake using 15 ingredients and 31 steps. Here is how you achieve that.
Ingredients of Cookpad Logo Christmas Wreath Cake
- Prepare 250 grams of Cream cheese.
- It's 200 ml of Heavy cream.
- It's 200 grams of Strained yogurt (450 g will reduce to about 200 g).
- You need 60 grams of Caster sugar.
- Prepare 1 tbsp of Lemon juice.
- Prepare 7 grams of Gelatin.
- Prepare 2 tbsp of Water for the gelatin.
- It's of Base:.
- It's 100 grams of You preferred biscuits.
- You need 50 grams of Unsalted butter or margarine for baking.
- It's of Garnish:.
- It's 1 of bottle's worth Apple jam (refer to Step 17).
- It's 1 of Mini jello serving (refer to Step 19).
- Prepare 1 of as much as you need Decorating pen (your preferred color).
- It's 8 of this time Strawberries.
Make sure the cake has completely cooled, remove from its tin and peel off the baking parchment. Are you searching for Christmas Wreath png images or vector? DesignEvo's cake logo creator will stimulate your inspiration at any time. A collection of delicate templates are there to help you make stunning cake logo designs.
Cookpad Logo Christmas Wreath Cake step by step
- Strain the yogurt. I use "pashaco's", which adds salt to the yogurt for a quick prep. https://cookpad.com/us/recipes/143831-the-fastest-strained-yogurt.
- Soak gelatin in water. Bring the strained yogurt and heavy cream to room temperature. Save 50 ml from the 200 ml of heavy cream for decorating..
- Pound the biscuits into fine crumbs. The biscuit packaging was thick, so I crumbled the biscuits over it with a rolling pin. If using a separate bag, make sure the bag is thick..
- Rub in microwaved butter to the bag of biscuit crumbs..
- When the biscuit crumbs have well-absorbed the butter, scatter on the bottom of the mold. Use a cup wrapped in plastic wrap to pack down the biscuit crumbs..
- In a microwave safe container, microwave the cream cheese for 15 seconds at 700 W, flip over and microwave for another 15 seconds. If it's still hard, watch over it and microwave for longer..
- Whisk the softened cream cheese..
- Add sugar and whisk..
- Add yogurt, heavy cream (150 ml), and lemon juice, and whisk. Save 50 ml of heavy cream for decorating..
- Microwave the gelatin until near boiling. If the mixture completely boils, it won't harden later..
- Add 2 spoonfuls of Step 9 to the heated gelatin and mix. I do this to avoid clumping..
- Add this mixture to the bowl at Step 9 and mix well. If the gelatin clumps, microwave the mixture for a bit..
- Microwaving won't completely melt the clumps, but will slightly melt it into the mixture..
- Strain the mixture once..
- Pour the strained mixture into the mold, cover with plastic wrap and chill in the refrigerator for more than 2 hours..
- As this cake is topped with the Cookpad logo, I made the logo with a chocolate decorating pen. Chill the design in the refrigerator..
- I referred to Cookpad user "Mel-chan love's" method shown here. It was super informative..
- For the background, I dissolved green and yellow food coloring for a lime-green dye..
- I used Cookpad user "Apitan's"to make a glaze for the fruits on top. This method is super convenient!! Definitely try it out. https://cookpad.com/us/recipes/144014-shiny-glaze-with-mini-jello-cups.
- I used an apple-flavored mini jello for the glaze..
- Cut the strawberries in half lengthwise..
- Take out the chilled cake from the fridge..
- Whisk the saved 50 ml of heavy cream with a scant teaspoon of sugar until peaks form..
- Put the whisked heavy cream into a piping bag and decorate the edges..
- Pour the lime green food coloring on the surface of the cake..
- Top with the hardened decoration. I designed the Christmas bell with a chocolate pen as well..
- Lay the strawberry halves along the edges of the cake, overlapping slightly..
- It'll look like this..
- Brush on "Apitan's" glaze from Step 19. It's easy to prepare and will help keep the strawberries glossy..
- Done!.
- I'll upload a Christmas version with the same recipe later..
You just need to choose an ideal template and adjust it with millions of icons and fonts without learning design skills. Recipes by home cooks for home cooks. Make everyday cooking easier and more fun! Deep Mind Hacking Logo designed by Lepchik. Connect with them on Dribbble; the global community for designers and creative professionals.
Got ingredients for making Cookpad Logo Christmas Wreath Cake recipes is also not hard. You can easily get the main ingredients at the nearest supermarket and indeed on the market. There are much kinds of Cookpad Logo Christmas Wreath Cake that are easy and fast to process into delicious dish. You can constantly practice this Cookpad Logo Christmas Wreath Cake recipe at home, and can provide it to your children and extended family. If you wish to cook another foods on our website, we prepare various types of food recipes which are of certainly very delicious and enjoyable to enjoy, please try them.


No comments :
Post a Comment